
Are you tired of those boring old blue links on your website? As a WordPress expert and SEO enthusiast, I’m thrilled to share with you three incredible ways to change the link color on your WordPress website. Well, buckle up, because I’m about to show you some super easy ways to spice up the link color and make them pop like never before.
In this article, I’ll walk you through three different methods, each with its own unique advantages and use cases. From the simple and straightforward to the more advanced and customizable, you’ll have a well-rounded understanding of how to transform the look and feel of your links.
So, let’s dive in and explore the endless possibilities in WordPress for link color customization!
- Change the link color individually
- Implement Custom CSS to Change the Link Color
- Change the link color using the WordPress Theme Customizer
1. Change the Link Color Individually through the WordPress Block Editor
One of the most convenient ways to change the color of individual links on your WordPress website is by using the WordPress Block Editor, also known as Gutenberg. This powerful tool allows you to easily customize the appearance of specific links within your content, making it an ideal solution if you want to draw attention to certain calls-to-action or highlight important information.
Here’s how you can change the color of individual links using the WordPress Block Editor:
Step 1: Insert a Link in the Block Editor
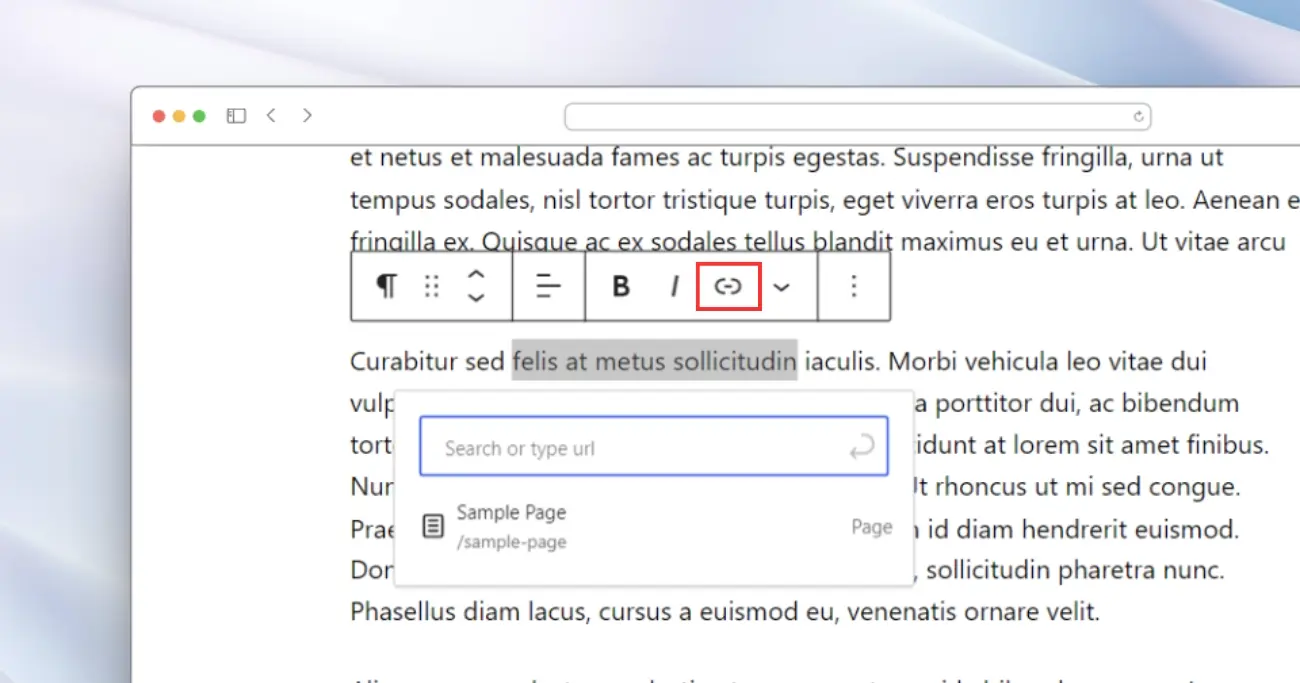
Start by creating or editing a post or page in the WordPress Block Editor. Then, select the text you want to turn into a link and click the link icon in the toolbar to insert the link.
Step 2: Access the Link Settings
Once you’ve created the link, click on it to reveal the link settings in the sidebar. You should see an option to customize the link color.
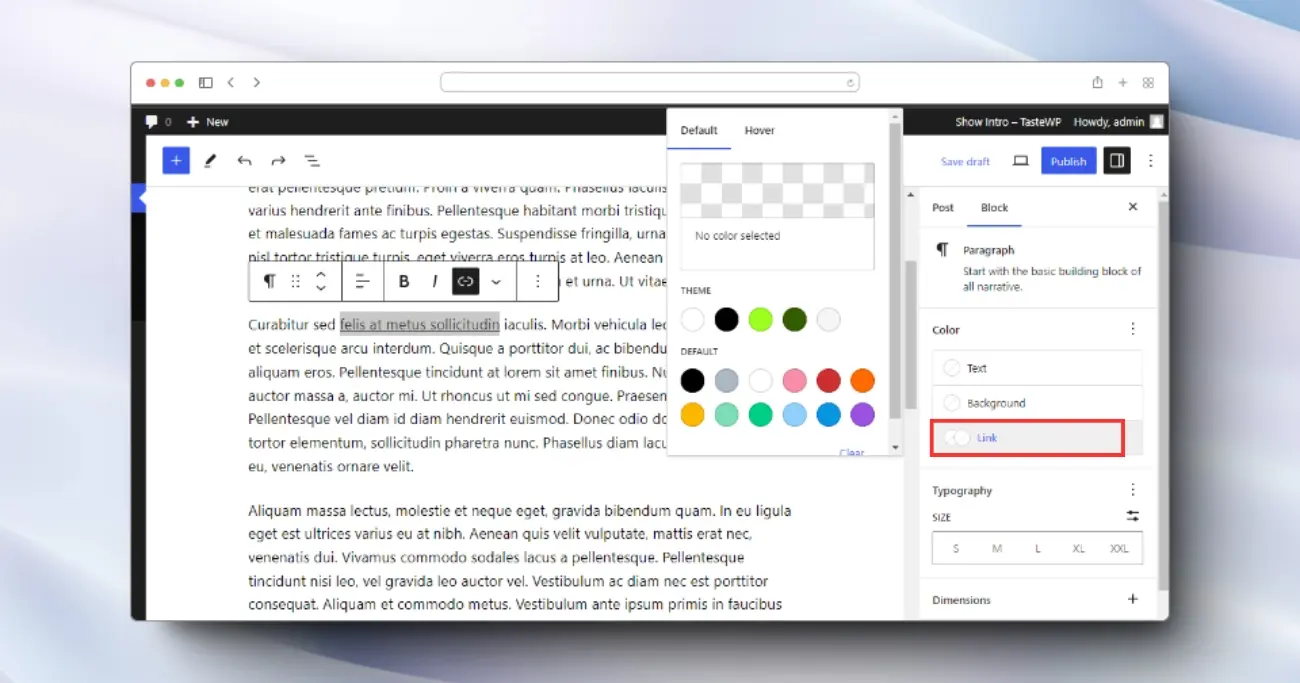
Step 3: Choose Your Link Color
In the link settings, you’ll find a color picker that allows you to select the desired color for your link. You can either choose from the preset colors or enter a specific hex code or RGB value for a more precise color selection.
Step 4: Apply the Changes
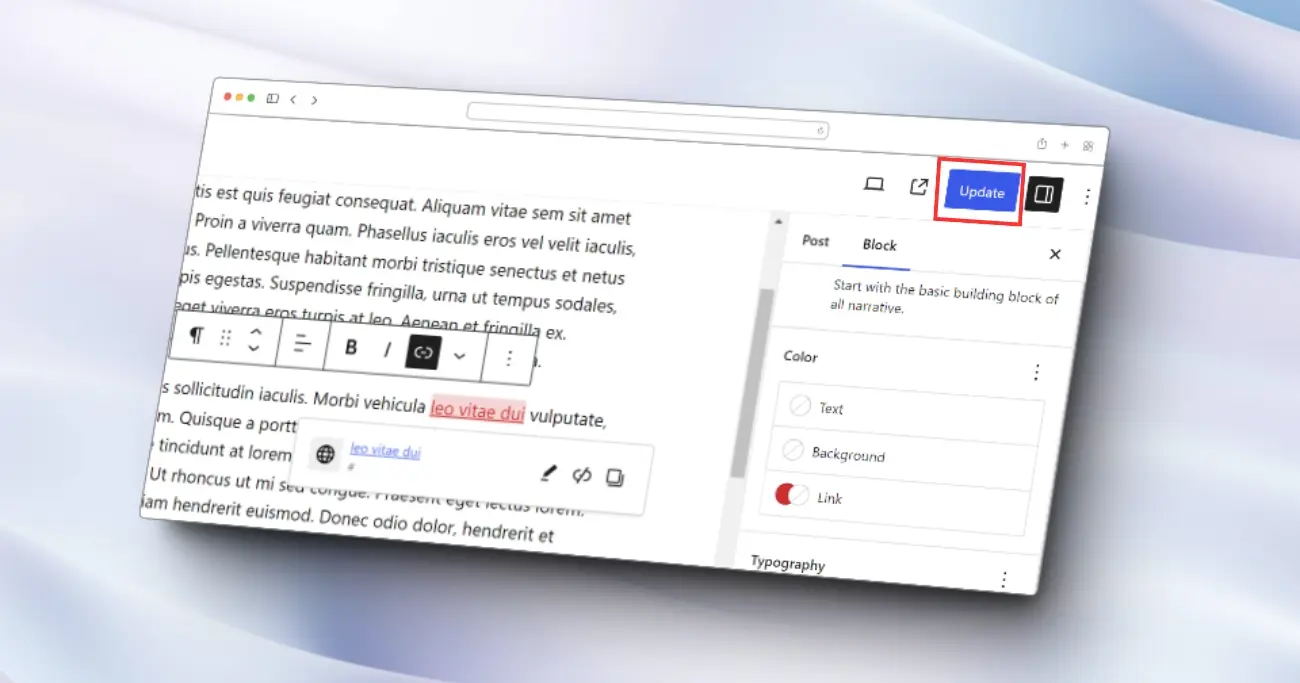
After selecting your new link color, the changes will be immediately reflected in the content of your post or page. You can continue to make adjustments until you’re satisfied with the result.
The beauty of this method is its simplicity and flexibility. Instead of having to make global changes to your link color across your entire website, you can now target individual links and apply unique colors to them. This can be especially useful if you want to draw attention to a particular call-to-action or highlight an important piece of information for your readers.
2. Change all Link Colors through Custom CSS
The easiest way to change the link color on all the pages on your WordPress website is by using custom CSS. You can add your custom CSS to your WordPress website using the WordPress Theme Customizer.
The WordPress Theme Customizer provides a user-friendly interface where you can easily add your own CSS code without having to directly edit your theme’s stylesheet.
Here’s a step-by-step guide on how to change the link color using custom CSS in the WordPress Customizer:
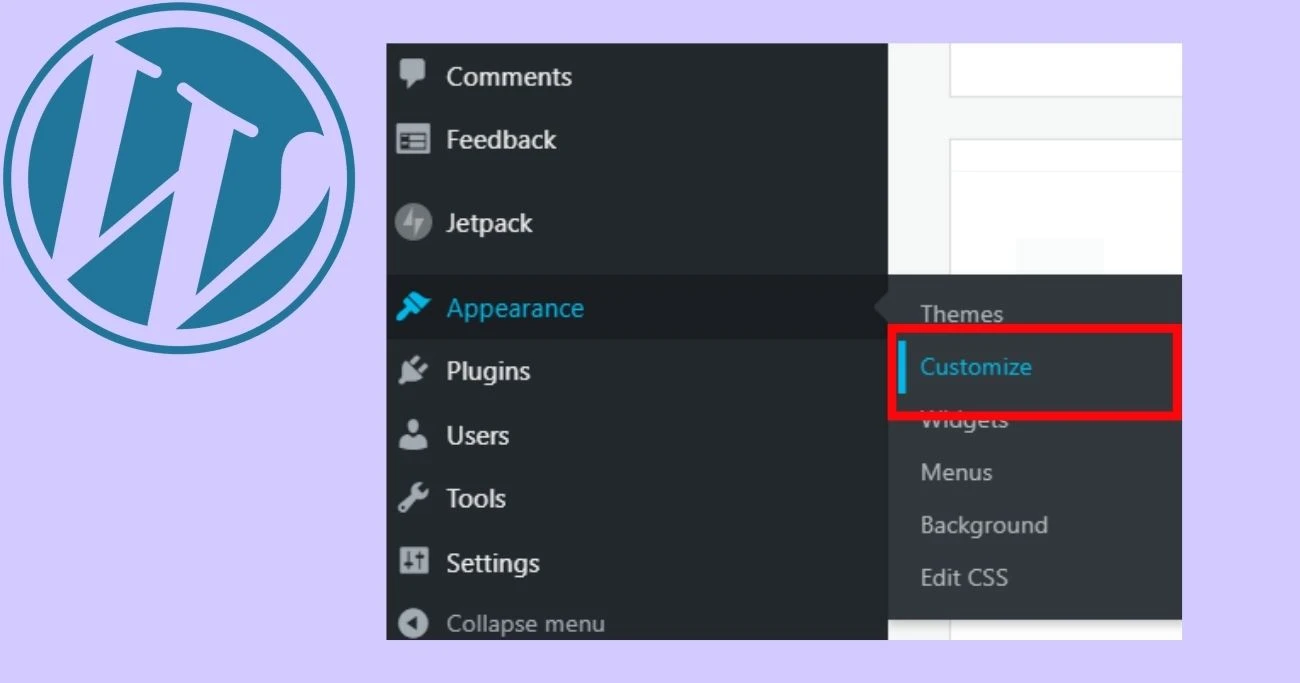
Step 1: Access the WordPress Customizer
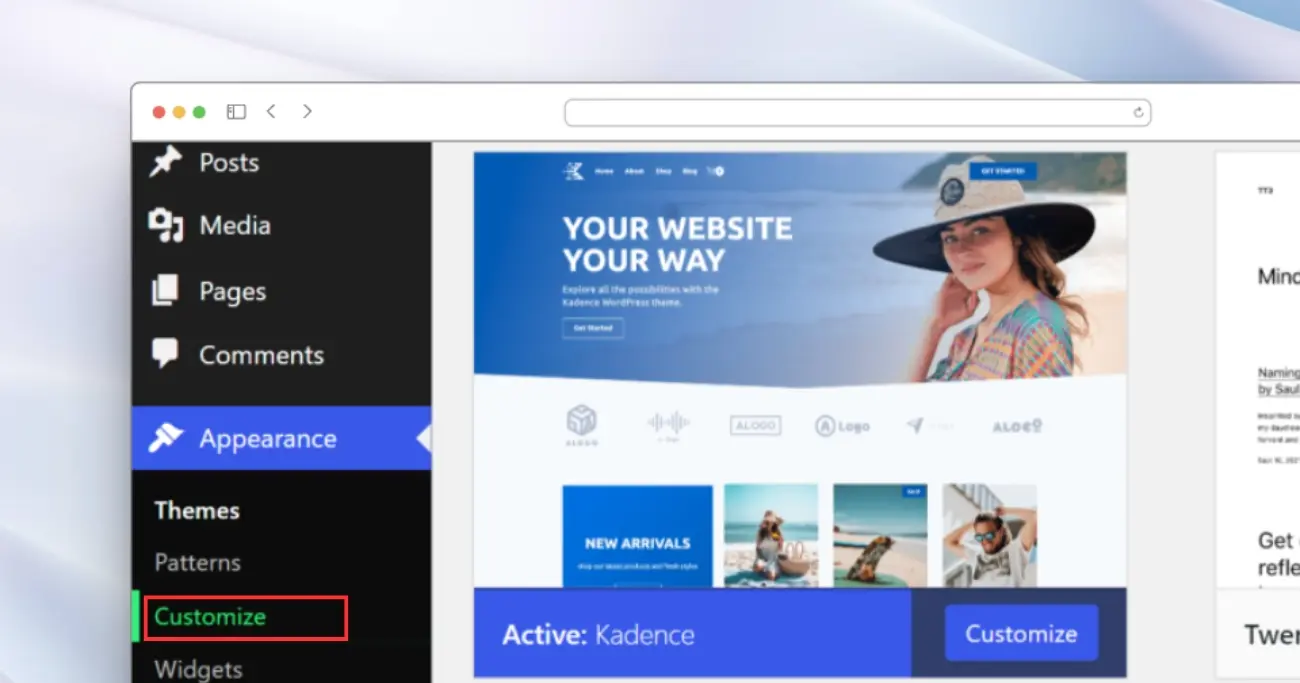
First, log into your WordPress admin panel and click on the “Appearance” option in the left-hand menu. From there, select the “Customize” option, which will take you directly to the WordPress Customizer.
Step 2: Find the Custom CSS Editor
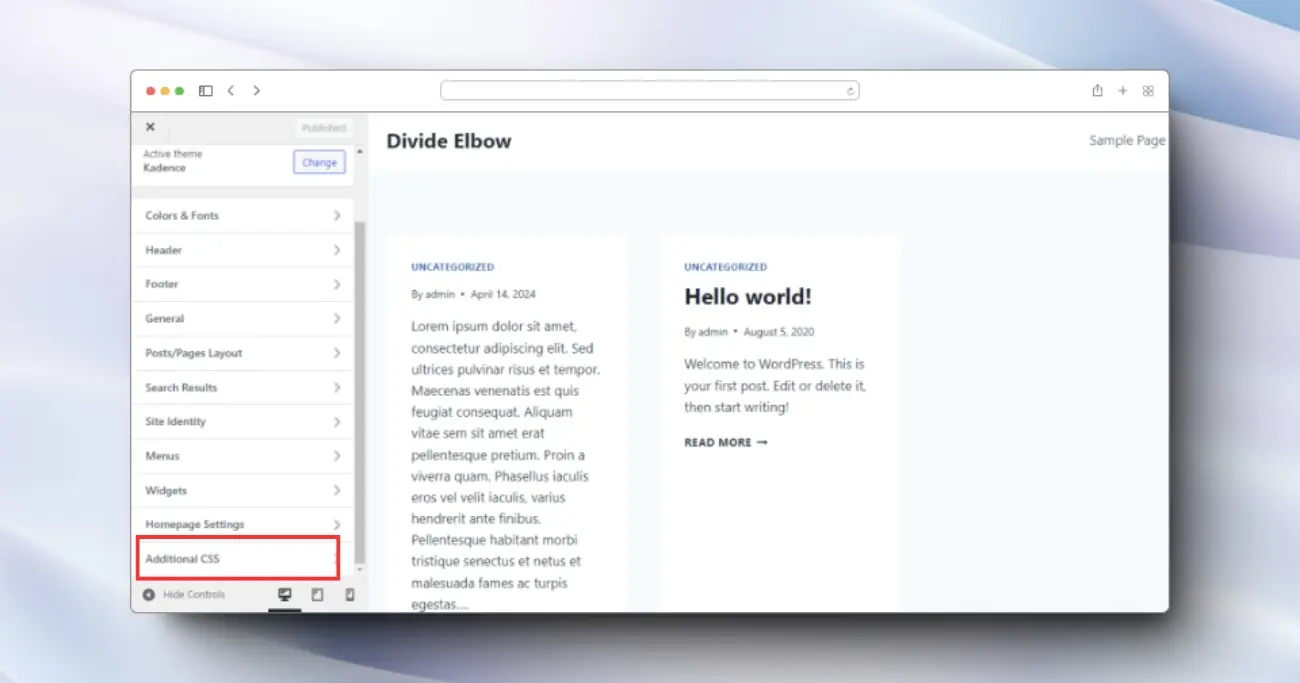
Once you’re in the Customizer, look for the “Additional CSS” section. This is where you’ll be able to add your custom CSS code to change the link color on your website.
Depending on your WordPress theme, the location of the “Additional CSS” section may vary. It’s typically found at the very bottom or “Additional” tabs in the Customizer.
Step 3: Add Your Link Color CSS
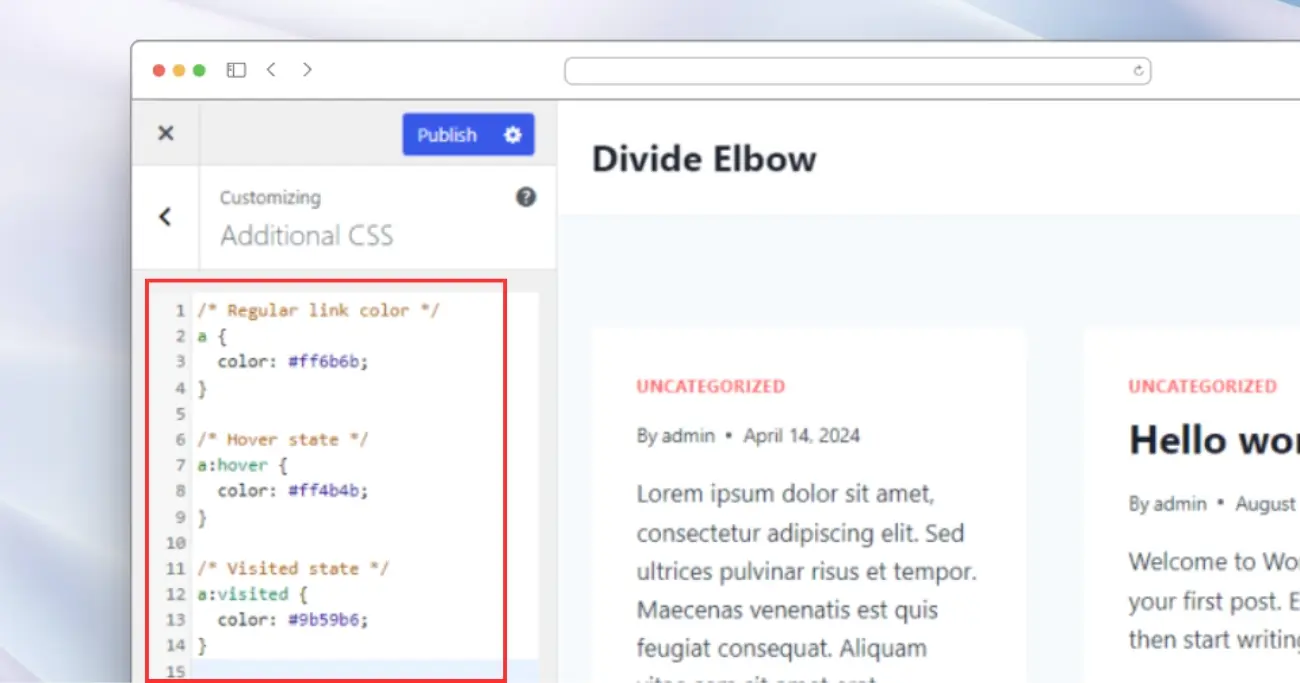
In the “Additional CSS” editor, you can now add the CSS code to change the link color on your website. Here’s an example:
/* Regular link color */
a {
  color: #ff6b6b;
}

/* Hover state */
a:hover {
  color: #ff4b4b;
}

/* Visited state */
a:visited {
  color: #9b59b6;
}
This code will set the regular link color to a vibrant red (#ff6b6b), the hover color to a darker red (#ff4b4b), and the visited color to a purple-ish hue (#9b59b6).
The :hover pseudo-class is used to target the link when a user hovers over it, while the :visited pseudo-class is used to target links that the user has already clicked on.
By using these CSS pseudo-classes, you can create a more dynamic and engaging user experience, as the link colors will change to provide visual feedback to your visitors.
Step 4: Preview and Publish Your Changes
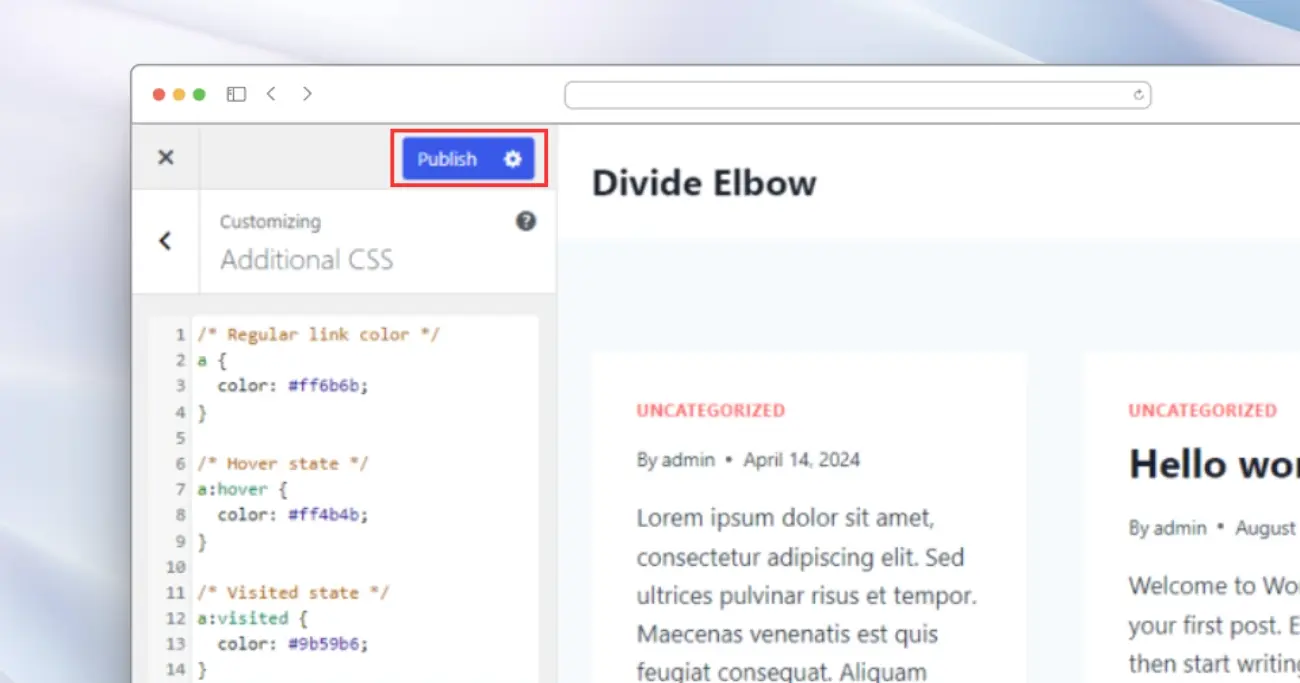
After adding your custom CSS, be sure to preview the changes to ensure they look exactly the way you want them to. The Customizer’s live preview feature will allow you to see the updated link colors in real-time.
Once you’re satisfied with the results, click the “Publish” button to save your changes and make them live on your website.
Using the WordPress Customizer to add your custom CSS is a beginner-friendly approach that allows you to change the link color without having to directly edit your theme’s files. This method is perfect for those who are new to WordPress and want an easy way to customize the appearance of their website.
3. Change the Link Color through WordPress Customizer Theme Settings
For WordPress beginners, another one of the easiest ways to change the link color on your website is by using the built-in theme settings in the WordPress Customizer. All the good WordPress themes come with dedicated settings that allow you to quickly and easily customize various aspects of your site’s appearance, including the link colors.
Here’s a step-by-step guide on how to change the link color using the WordPress Customizer theme settings:
Step 1: Access the WordPress Customizer
Start by logging into your WordPress admin panel and navigating to the Customizer. You can do this by clicking on the “Appearance” option in the left-hand menu and then selecting “Customize”.
Step 2: Locate the Theme’s Color Settings

Once you’re in the Customizer, you’ll need to look for the section that contains your theme’s color settings. Depending on your WordPress theme, this may be labeled as “Colors”, “Styles”, or something similar.
The exact location of the color settings can vary from theme to theme, so take a moment to familiarize yourself with the Customizer layout. Look for tabs or sections that seem to be related to customizing the overall appearance of your website.
Step 3: Find the Link Color Setting

Within the theme’s color settings, you should be able to find a specific setting for changing the link color. This may be labeled as “Link Color”, “Link Text Color”, or a similar variation.
Again, the exact wording and location of this setting will depend on your WordPress theme, so take your time to explore the different options available in the Customizer.
Step 4: Select Your New Link Color
Once you’ve found the link color setting, you can now choose the color you want to use for your links. The WordPress Customizer typically provides a user-friendly color picker tool, allowing you to select from a wide range of hues and shades.
If you’re feeling adventurous, you can even enter the specific hex code or RGB values of the color you’d like to use. This gives you even more control over the exact shade of your links, ensuring they perfectly complement the overall design of your website.
Step 5: Preview and Publish Your Changes
After selecting your new link color, be sure to preview the changes to make sure they look exactly the way you want them to. The Customizer’s live preview feature will allow you to see the updated link colors in real-time.
Once you’re satisfied with the results, click the “Publish” button to save your changes and make them live on your website.
Remember, the exact location and wording of the link color setting may vary depending on the WordPress theme you’re using. However, the general process of accessing the Customizer, navigating to the color settings, and selecting a new link color should be consistent across most themes.
Frequently Asked Questions
Q1: Can I change the link color for specific sections of my website, like the sidebar or footer?
Yes, you can! When using custom CSS to change the link color, you can target specific areas of your website by using CSS selectors. For example, to change the link color in your sidebar that has a class name of “sidebar”, you could use the following CSS:
.sidebar a {
 color: #9b59b6;
}
This would only apply the purple link color (#9b59b6) to the links within your sidebar, while leaving the rest of your website’s links unaffected.
Q2: How do I change the link color for visited links?
To change the color of visited links, you can use the :visited CSS pseudo-class. Here’s an example:
a {
  color: #0077b6;
}

a:visited {
  color: #8c1aff;
}
This code will set the regular link color to a blue-ish hue (#0077b6) and the visited link color to a purple-ish hue (#8c1aff).
Q3: Can I use a plugin to change the link color instead of custom CSS?
Absolutely! There are several WordPress plugins available that allow you to easily change the link color without having to write any CSS code. Some popular options include “Fluent Snippets” and “WPcode“
These plugins provide a user-friendly interface in the WordPress Dashboard, making it easy to select and apply your desired link color with just a few clicks.
Q4: Will my link color changes be lost if I update my WordPress theme?
If you’ve made your link color changes by directly editing your theme’s CSS file, then yes, those changes may be overwritten when you update your theme. To prevent this, it’s recommended to use a child theme or the WordPress Customizer’s “Additional CSS” feature, as these methods will preserve your customizations even after a theme update.
Q5: How do I change the link color for links within the content of my posts and pages?
To change the color of links within the content of your posts and pages, you’ll need to use CSS. You can either do this directly in the Customizer’s “Additional CSS” section or by adding the CSS to your child theme’s stylesheet.
The CSS code you’ll need to use is:
a {
  color: #your-new-link-color;
}
Replace #your-new-link-color with the hex code or RGB value of the color you want to use.
Q6: Can I change the link color globally across my entire WordPress site?
Yes, you can change the link color globally by using the following CSS:
a {
 color: #your-new-link-color;
}
This will update the link color on every page and post of your WordPress site, ensuring a consistent look and feel throughout.
Q7: How do I change the link color for the menu or navigation bar?
The process for changing the color of links in your menu or navigation bar is the same as changing the color of regular links on your website. Simply follow the steps outlined in the methods above, and your menu links will be updated as well.
Q8: Can I change the link color differently for hover and active states?
Yes, you can! WordPress allows you to target and style links in different states using CSS pseudo-classes. Here’s an example:
/* Regular link color */
a {
  color: #0077b6;
}

/* Hover state */
a:hover {
  color: #005a8e;
}

/* Active state */
a:active {
  color: #b30059;
}
This code will change the link color for the regular, hover, and active states, giving you more control over the overall look and feel of your website.
Q9: What’s the difference between the :hover and :active pseudo-classes?
The :hover pseudo-class is used to target the link when a user hovers over it, while the :active pseudo-class is used to target the link when a user is actively clicking or pressing on it.
The :hover state is typically used to provide visual feedback to the user, such as changing the link color or adding an underline. The :active state, on the other hand, is often used to indicate that the link is currently being interacted with.
Q10: Can I use a combination of methods to change the link color?
Absolutely! You don’t have to stick to just one method for changing the link color on your WordPress website. Feel free to experiment and use a combination of approaches, such as using the WordPress Customizer for global link color changes and the Block Editor for targeting specific links within your content.
The flexibility of WordPress allows you to mix and match different techniques to achieve the exact look and feel you’re going for on your site.
Conclusion
In this article, I’ve explored three powerful methods for changing the link color on your WordPress website: using the WordPress Block Editor, implementing custom CSS, and leveraging the WordPress Customizer’s theme settings.
Remember, the key to successful link color customization is to experiment and find the perfect balance that complements your website’s overall design. Don’t be afraid to try different colors, hover effects, and targeted approaches until you achieve the look you’re going for.
By unlocking the power of link color customization, you’ll be able to enhance the user experience, improve accessibility, and ultimately, make your website stand out from the crowd. So, go forth and start exploring the endless possibilities of link color customization in WordPress