Updating WordPress can sometimes lead to unexpected issues that prevent your site from working properly. This comprehensive guide covers the most common WordPress update errors and how to fix them.
What Causes WordPress Update Issues?
Before diving into specific errors, it helps to understand what generally causes problems with WordPress updates:
- Outdated plugins/themes – If your plugins or themes aren’t compatible with the latest WordPress version, conflicts can occur.
- Plugin/theme conflicts – Sometimes plugins or themes conflict with each other after an update.
- Changes to WordPress core files – Updates often include changes to core WordPress files. If these files get overwritten incorrectly, errors happen.
- Server configuration issues – Updates may expose existing PHP, MySQL, or web server configuration issues.
If you run into timeout errors when trying to update WordPress, take a look at this guide on Quick Fixes for WordPress Timeout Update Issues to troubleshoot the problem. It provides some easy tips from WordPress experts to get your site updated properly.”
Knowing the potential sources of update errors makes troubleshooting much easier. As you can see, outdated or incompatible plugins and themes are a super common culprit behind WordPress update failures. I made a handy guide for beginners on how to pick the right WordPress theme for your site’s needs. My tips help ensure you have an update-proof theme that won’t cause conflicts!
Troubleshooting the Most Common WordPress Update Errors
Let’s go through the specific WordPress update errors you may encounter:
White Screen of Death After Update
Seeing a blank white screen after updating WordPress is terrifying. This “White Screen of Death” means PHP errors are preventing your site from loading properly. Here’s how to fix it:
Cause:
- Plugin/theme conflicts – An update reveals an issue with a plugin or theme that breaks your site.
Seeing a plain white screen instead of your beautiful website is scary! But don’t worry, we can walk through how to troubleshoot this.
Step 1: Login to Your Web Host’s File Manager
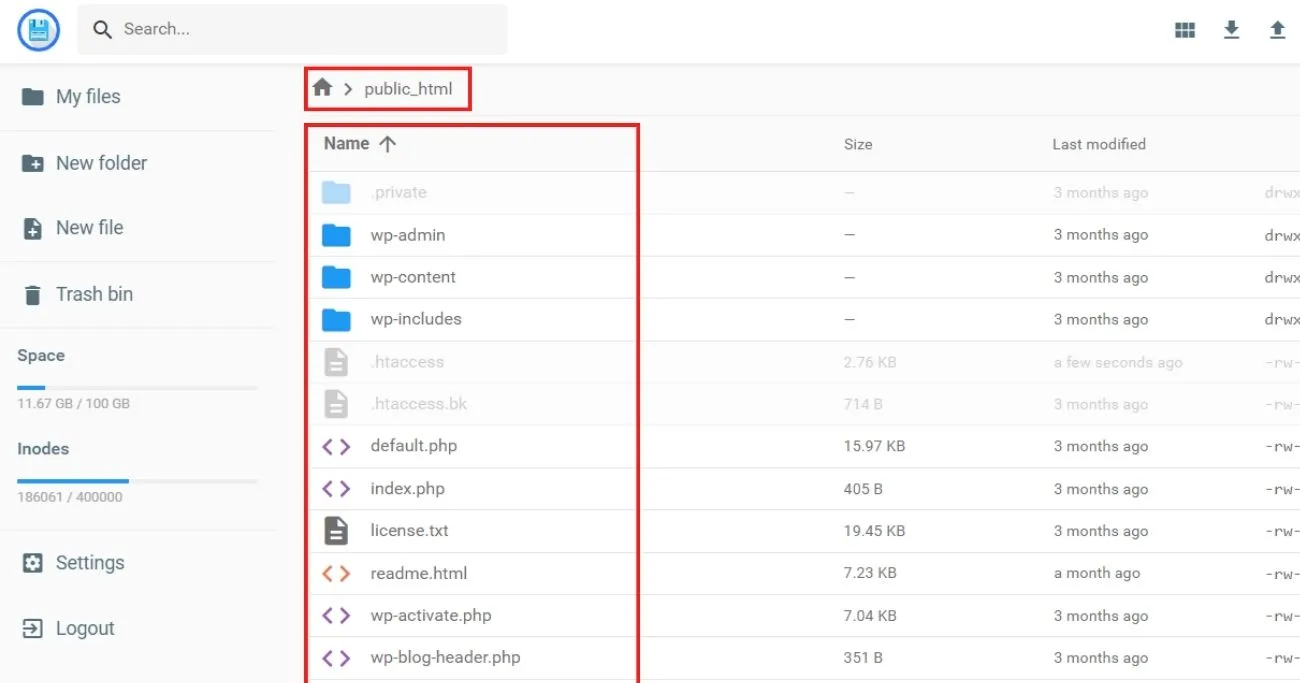
First, we need to access your actual WordPress files:
- Open your web host’s file manager in your web browser.
- Type in the login credentials for your hosting account if prompted.
- Once logged in, on the left you will see all the folders for your account. Click to open the one with your actual website files. It is usually named something like
public_html. - Inside you will see folders like
wp-admin,wp-content, andwp-includes. We are in the right spot!
Step 2: Temporarily Disable Your Plugins
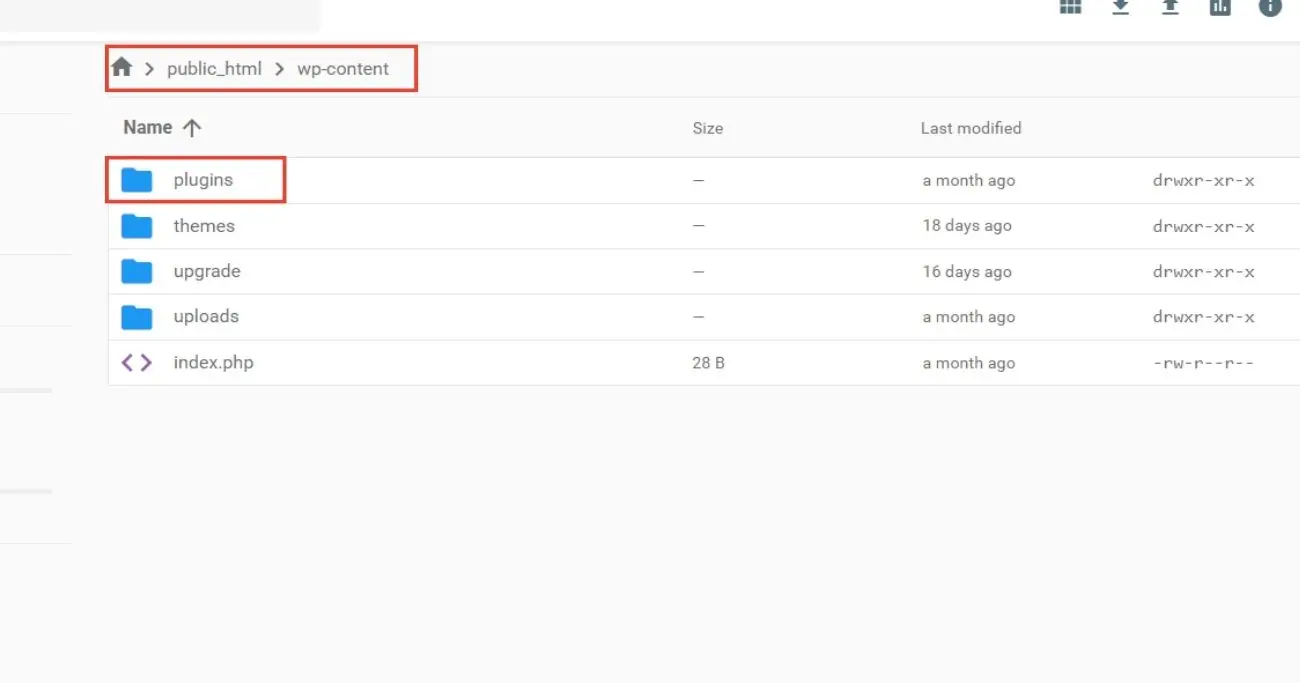
Plugins sometimes cause issues with WordPress updates. We need to disable yours as a test:
- Expand the
wp-contentfolder, you will see thepluginsfolder inside. - Rename
pluginstoplugins2so WordPress ignores the folder. - Load your site in the browser now. If the white screen is gone, a plugin was causing it!
Step 3: Re-enable Plugins One at a Time
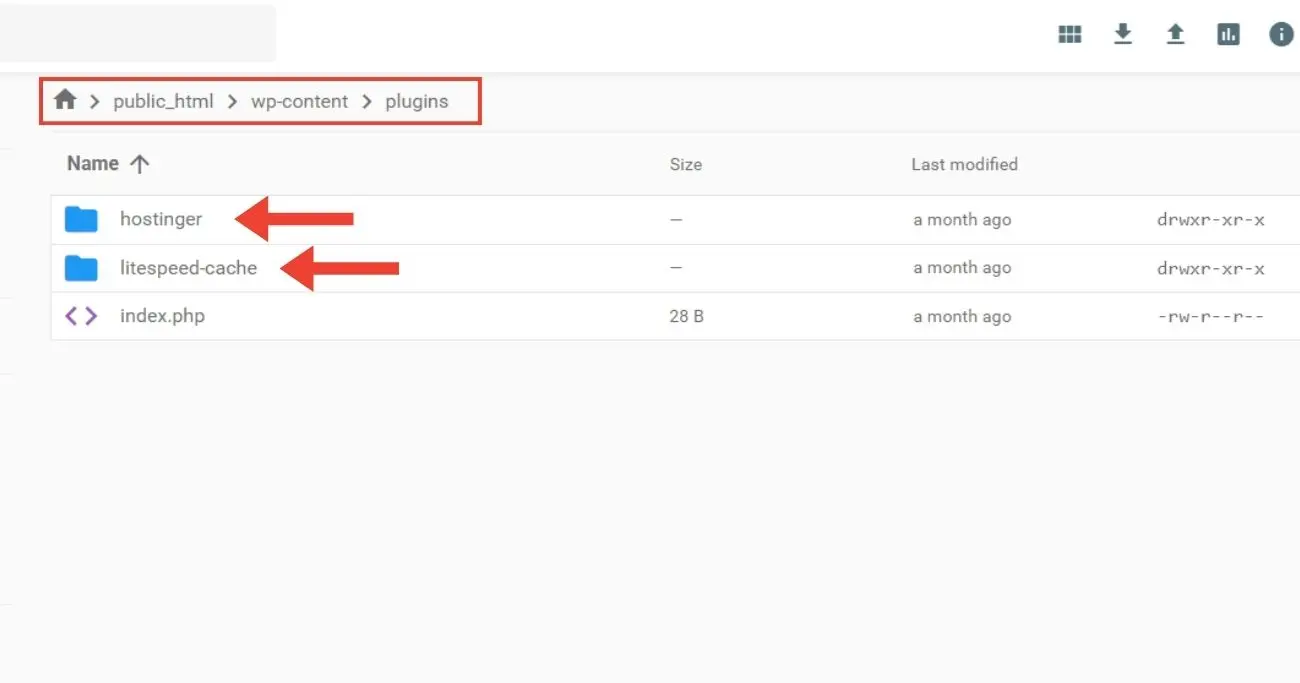
Now we can pinpoint the bad plugin:
- Rename
plugins2back toplugins. - Go in and you will see folders of all of your installed plugins.
- Then rename the first folder inside
pluginslike rename the folderElementortoElementor2. - Go to your website and try to reload to see if it works now. If not then rename the second folder inside
pluginsand rename the first one back to its default name. - Do this for all the plugin folders available inside
pluginsone by one. - Check if your site works now. If yes, that last plugin you renamed caused issues!
Step 4: Get a Fresh Copy of the Bad Plugin
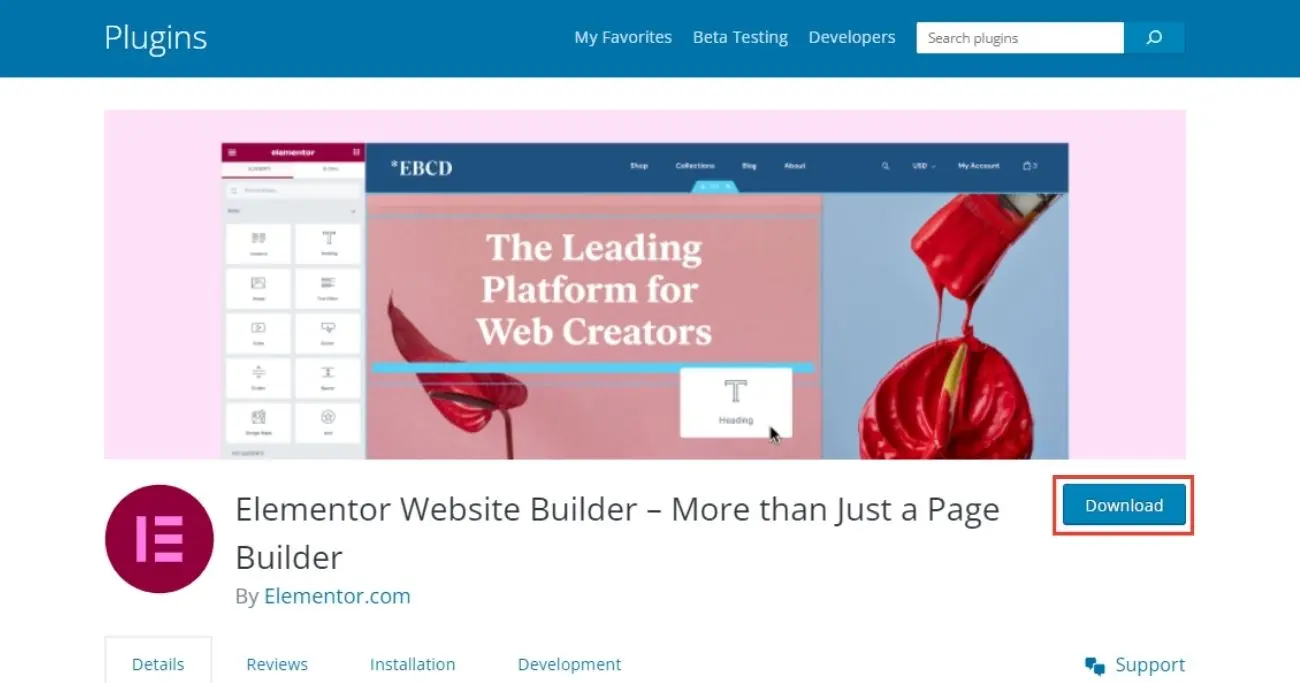
Once you find the bad plugin, delete it and re-install a clean, new copy of that plugin’s files from the original developer or download it from the WordPress plugin repository. This will often fix things right up!
And we’re back! The white screen is gone for good.
“Error Establishing a Database Connection” After Update
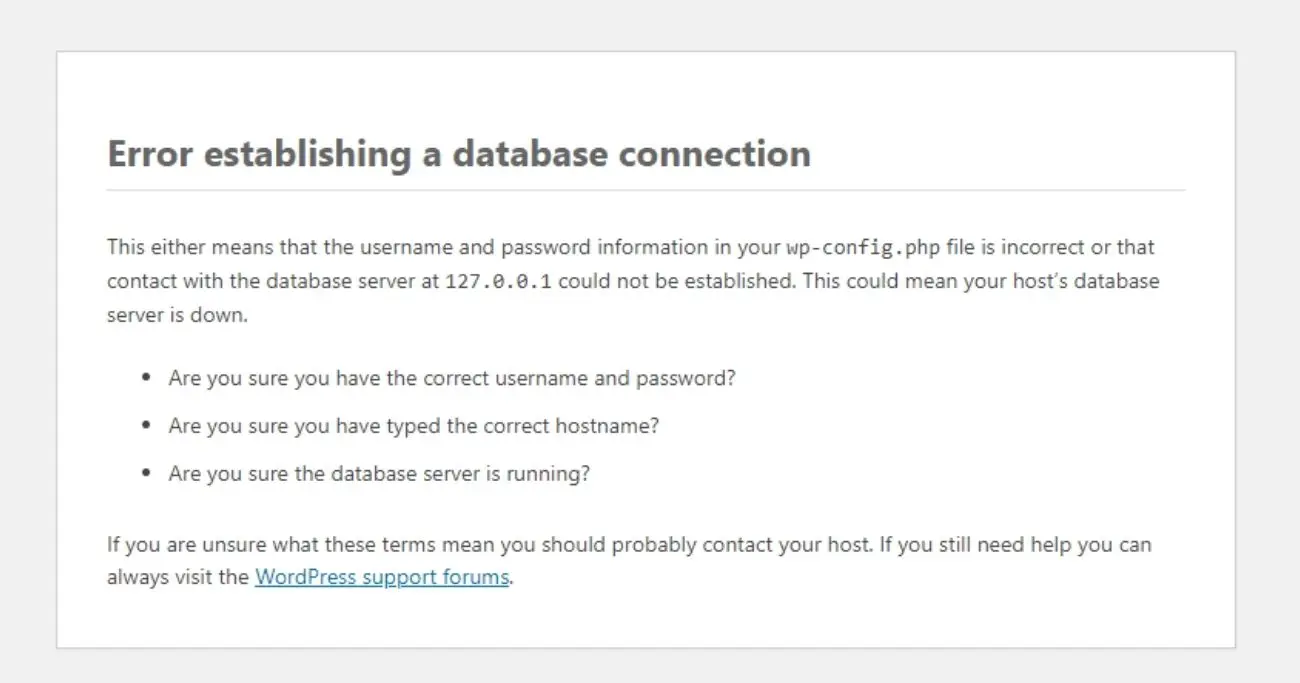
This error means the update broke communication between WordPress and your MySQL database:
Causes:
- Incorrect database credentials – An update may have altered the wp-config settings needed to connect to the database.
- Privilege issues – Database users may lack proper access permissions needed after an update.
- Corrupted
.htaccessfile – If this file gets corrupted during an update, it can break database connectivity.
Fixes:
You might see an error saying “Error Establishing a Database Connection” or that WordPress can’t find the database. This means something went wrong with the connection from WordPress to where your website data is stored. Not good! But we can definitely fix this.
Let’s walk step-by-step through how to get WordPress talking to the database again.
Step 1: Open Your wp-config.php File from your server.
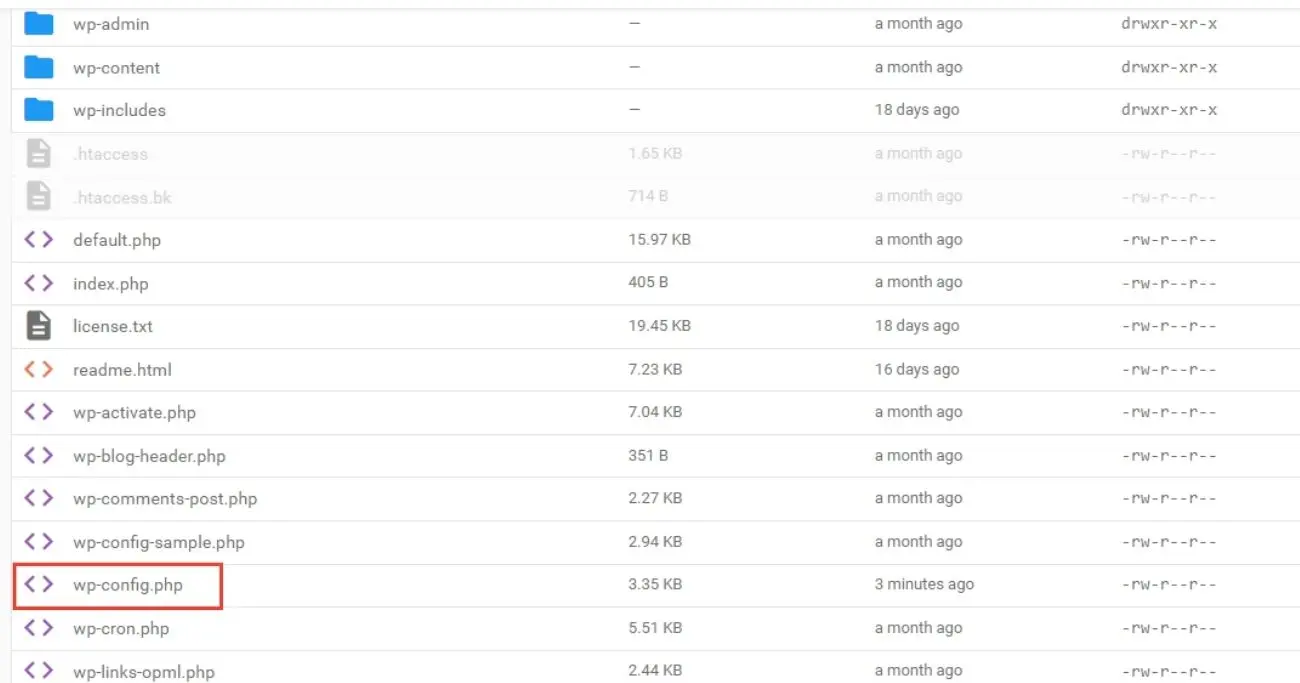
- Log in to your web hosting or cPanel.
- Once you log in, look for the file manager icon. Click this to view your web host files.
- Now locate a PHP file named
wp-config. It would be generally available inside thepublic_htmlfolder.
This special file tells WordPress how to connect to the database. We need to check that the login details are right:
- Click to open the folder called
public_html– your WordPress files are in here. - Next, open the
wp-configfile. We want to check a few key settings here.
Step 2: Update Database Credentials
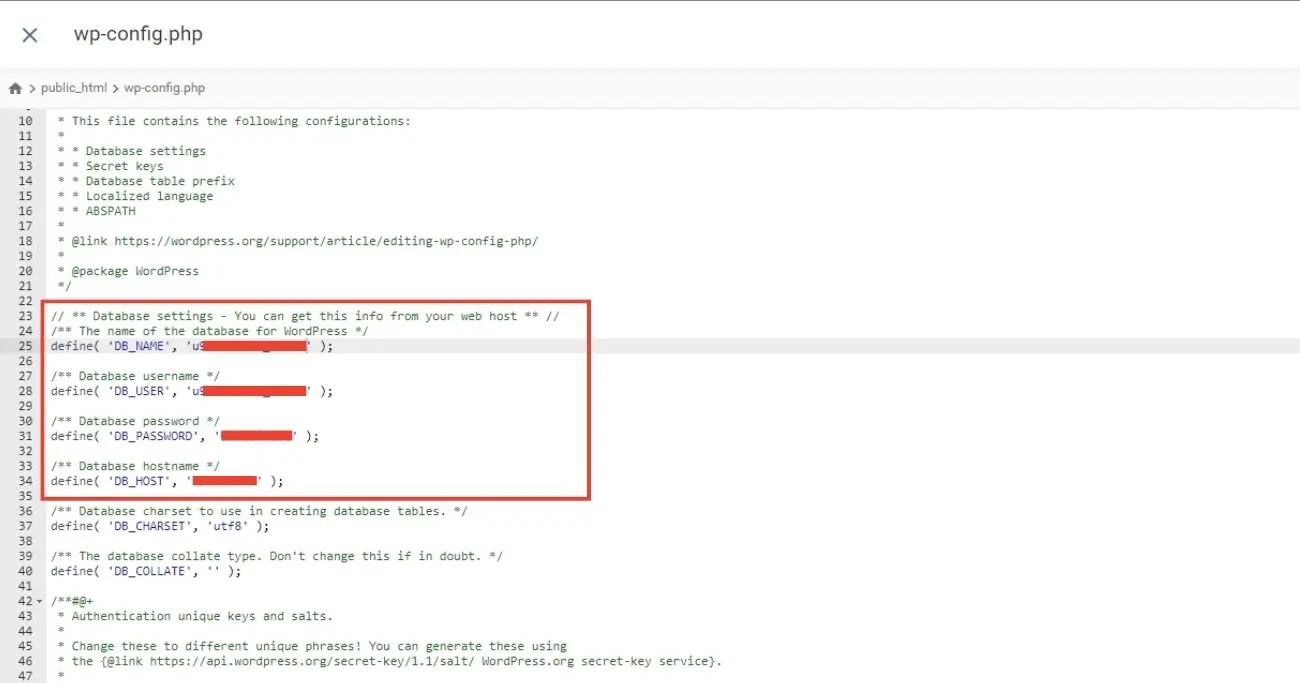
We now need to compare the info in wp-config to your actual database details:
- Make sure the database name, username, password, and localhost/hostname match what your host has set up.
- Update anything that is incorrect. Save
wp-config. WordPress will now have the right details to talk to the database again!
What if I Don’t Know My Database Credentials?
No problem! Your web host has all the database details handy for you. You can talk to your hosting support team to ask for your database login credentials.
Alternatively, here’s how to find your access credentials manually:
- Log in to your web host control panel like before. Look for the databases icon/menu.
- Click on the database assigned to your WordPress site. There will likely be a credentials tab or user management section.
- Here you will see your database name, database username, password, and the database server name (usually the localhost or a custom hostname).
- Make a note of all these. We will plug them into the wp-config file next.
Now that you have retrieved your actual database credentials from the host, head back to the wp-config file steps I covered earlier.
Endless Update Loops
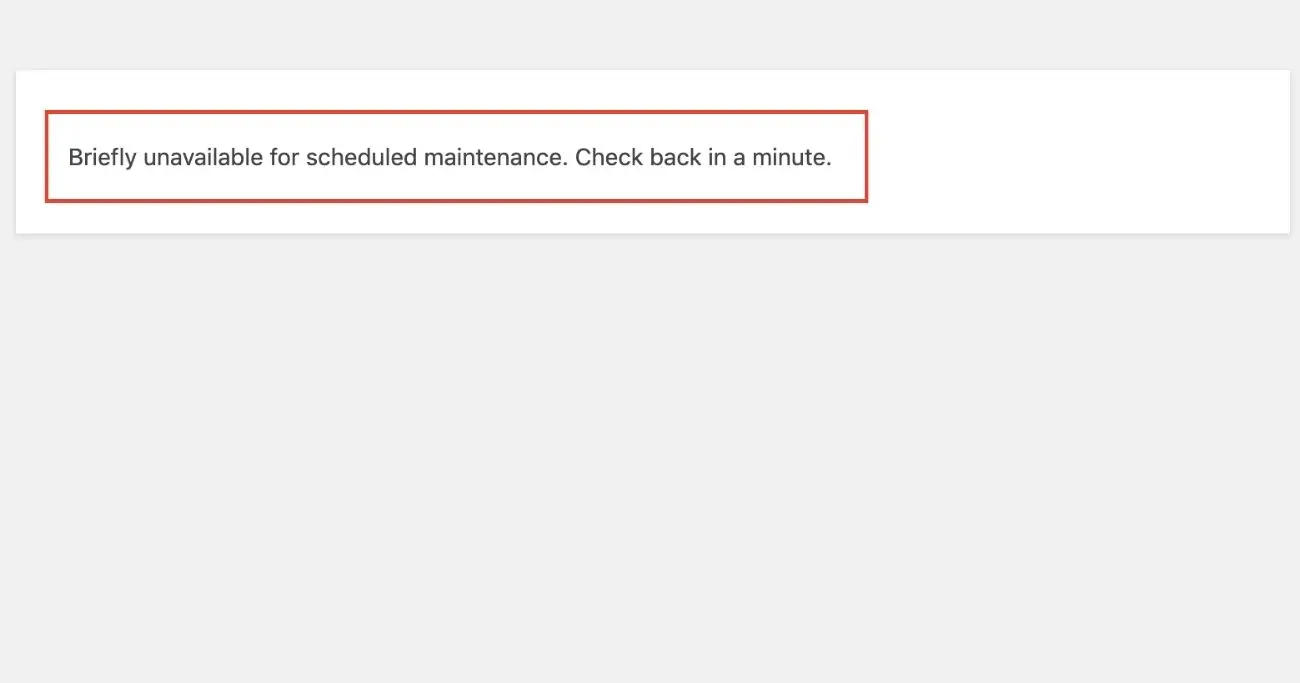
Getting stuck in an infinite loop while updating WordPress can be incredibly frustrating and it starts displaying maintenance mode:
“Briefly unavailable for scheduled maintenance. Check back in a minute.”
Causes:
- Corrupted files – Errors during updates may leave corrupted files behind that cause issues with future updates.
- Core file overwrites – If core WordPress files don’t overwrite correctly, update scripts may fail to run properly.
Fixes:
- Manually replace core files – Download fresh WordPress core files from wordpress.org and replace your existing installation.
But be careful manually replacing WordPress system files! It’s easy to accidentally break things worse. I’d recommend reading my beginner’s guide on how to safely update WordPress without messing anything up before trying to replace your installation.
- Reset plugins/themes – Rename plugin/theme folders temporarily to see if that allows updates to run smoothly as mentioned in the above steps.
- Fix file permissions – Check that WordPress has write access to files. Incorrect permissions can block updates.
“Destination Folder Already Exists” Error
This common error occurs when trying to overwrite WordPress core files:
Copy code
Error unzipping: destination folder already exists
Seeing the “destination folder already exists” error message when trying to update WordPress can make you want to rip your hair out! This super frustrating error means WordPress can’t overwrite some important folders on your site.
Not to worry – with the right file access, we can squash this bug quickly. Just follow along step-by-step and we’ll have your update back on track in no time!
Step 1: Checking Your File Permissions
Permissions decide who can access, edit, or write to files and folders on your hosting account. If your permissions are wrong, WordPress can’t overwrite its own folders when updating:
Understanding File Permissions
Permissions come in 3 main types:
Read Access
- Lets you view the files but not edit them.
Write Access
- Lets you modify existing files or add new ones.
Execute Access
- Lets you run certain types of files if they are programs.
Web hosts usually give you “read” access by default. But WordPress updates need “write” access to work properly.
How to Check Your File Permissions
- Log in to your web host using the credentials they provided upon signup.
- Navigate to the file manager. There you can see all files/folders.
- Click on the WordPress installation folder. Check for write permissions.
- If none exist, keep reading to learn how to add them!
Step 2: Changing Folder Permissions
If the permissions check reveals that your user account lacks write access, here is how to add it:
Understanding Users and Owners
Your web host system has user accounts and owners:
- Users – Various user accounts that can access files under permissions granted to that named user.
- Owners – The user account that owns a given file or folder. The owner usually has full read/write/execute permissions.
Ideally, your user account should be set as the owner of the WordPress folders. Owners can access files without permission issues.
Setting Yourself as Owner
- In the file manager, right-click on WordPress root and subfolders.
- Click “Change Owner” in the menu that opens.
- Change the owner account to your hosting cPanel user account.
- Now your user will have owner permissions to update files!
Step 3: Adjust Manual File Permissions
If changing folder ownership does not work, we can manually alter permissions instead:
WordPress Core vs. wp-content
WordPress core folders like /wp-admin/ or /wp-includes/ run the overall system.
But /wp-content/ holds your custom uploads, plugins, etc. Both need write permissions.
Manually Configuring Permissions
- Right-click each WordPress core folder like
/wp-admin/. - Click Permissions (or sometimes File Attributes).
- Check the box labeled “Write” to allow modifying files.
- Repeat for
/wp-content/any other core folders.
This grants manual write permissions. Now WordPress update can overwrite its system folders without errors!
Step 4: Adjusting .htaccess Settings
The hidden .htaccess file also governs file permissions. We may need to configure special settings here:
Understanding .htaccess
The .htaccess file has code that Apache web servers use to control permissions, redirects, and other functions:
- Gets interpreted each visit to apply custom rules.
- Overrides some default permission settings for flexibility.
- Starts with standard default WP content if missing or corrupted.
During a botched update, sometimes this file becomes altered or overwritten incorrectly. Replacing it can fix permissions issues.
Replacing Your .htaccess File
- In the file manager, navigate to the WordPress root folder.
- Delete the existing
.htaccessfile - Open the dashboard and navigate to Permalinks.
- Click Save to make WordPress generate fresh
.htaccess. New default permissions will now be set!
Can’t Log In After Update
A WordPress update changing login functionality can unexpectedly lock you out:
Causes:
- Login plugin conflicts – An updated plugin may conflict with custom login plugins you have enabled.
- Cookie issues – Updates may wipe out or alter essential WordPress login cookies.
Fixes:
- Reset passwords – Use the “lost password” feature to reset your password via email.
- Update cookie settings – Try adjusting cookie settings via the
wp-config.phpfile. - Disable login plugins – Rename plugin folders like “/wp-content/plugins” to temporarily disable them.
Site Down or 500 Errors After Update
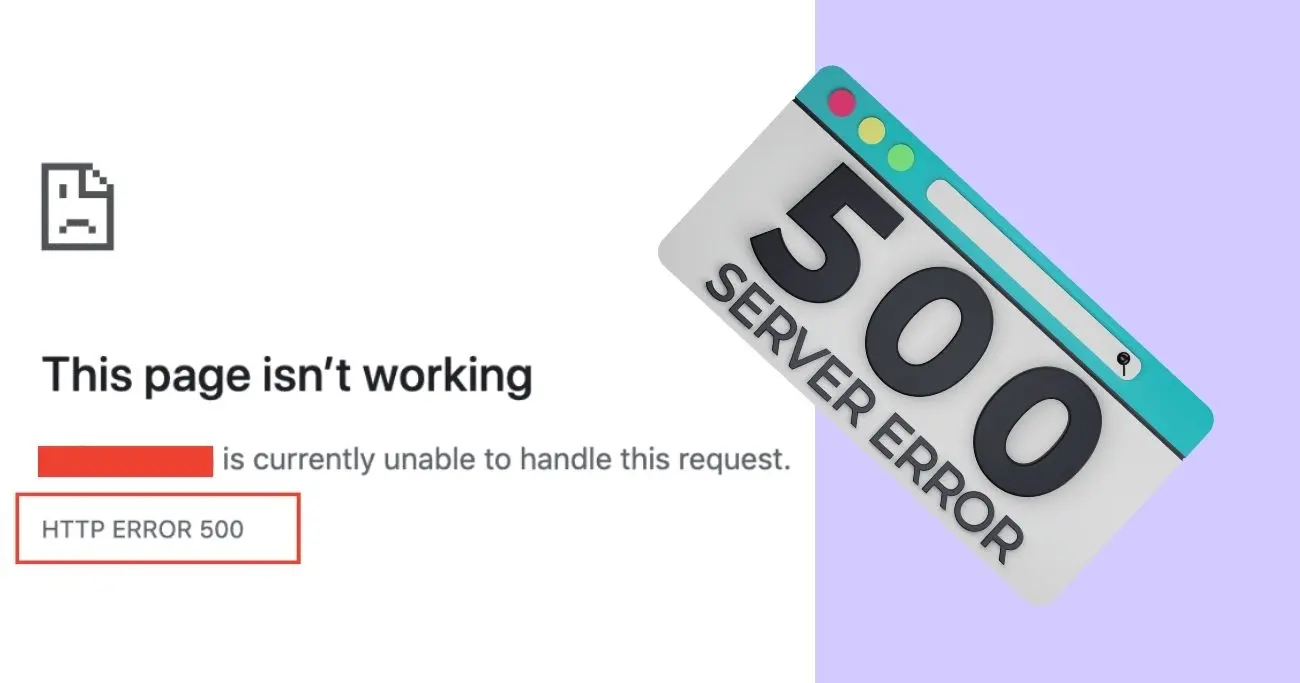
A WordPress update leading to your site displaying 500 errors or just outright crashing can be incredibly worrisome! But these frustrating errors almost always stem from a few common and fixable causes like resource limitations or incompatible software versions.
With some targeted troubleshooting for crashes and 500 internal server issues, we can get your site stable again quickly.
Step 1: Put Your Site in “Maintenance Mode”
Since things are currently broken after the update, we want to activate maintenance mode to hide errors from visitors temporarily:
What Does Maintenance Mode Do?
- Displays a simple “Down for Maintenance” message to all visitors.
- Allows admin users to still access the dashboard and backend.
- Lets you safely troubleshoot errors without disrupting users.
Activating Maintenance Mode Quickly
- Login to your WordPress dashboard if not already.
- Install and activate the WP Maintenance Mode plugin.
- Click the plugin’s tab and enable Simple Mode. This will now display the down message to hide crashes as you fix things!
Step 2: Check Web Host Resource Usage for Limits
If an update pushed your site over the maximum resources allowed by your hosting plan, that could easily cause crashes and 500 errors as activity spikes:
Keeping Resource Usage Under Quotas
Shared web hosts assign limited amounts of:
- CPU Cores – Process tasks for your site code.
- RAM – Stores temporary visit and activity data.
- MySQL Database Space – Stores all your site content.
Monitoring Current Usage
- Log in to your web hosting cPanel.
- Locate Resource Usage graphs for CPU, RAM allocation, and MySQL.
- If any display of high usage exceeds the quota, then resource limits are likely to cause crashes. Time to upgrade the hosting plan!
Step 3: Review the Compatibility of Your PHP Version
An outdated PHP version can also lead to problems after a WordPress update introduces improved but incompatible code.
Understanding PHP Requirements
PHP is the programming language that runs WordPress behind the scenes:
- Each WordPress version needs a minimum PHP version to work properly.
- Outdated PHP often lacks security fixes and efficient code.
- 500 errors can occur if PHP can’t handle new WordPress functionality.
In addition to PHP requirements, enabling HTTPS and SSL encryption across your WordPress site is also considered a security best practice nowadays.
Checking Your PHP Version
- Create a temporary PHP file anywhere in your WordPress folder.
- Add a line to print your PHP version:
<?php echo phpversion(); ?> - Load this file in the browser and it will display your version.
- Compare to the latest requirements on WordPress.org. Time to update PHP if not meeting minimum!
Step 4: Manually Configure PHP Settings in wp-config
Even if your PHP version looks compatible, we may need to alter configurations in WordPress for trouble-free functionality:
PHP Configurations Defined
Several key PHP settings living in your wp-config.php file govern critical functionality like:
- Error Display – Prints or hides errors from visitors.
- Script Execution Timeouts – Determines max run time before timeout.
- Memory Limits – Limits total RAM usage per script.
After an update, new codes may need increased resources.
Boosting Resources Manually in wp-config
- Using FTP or file manager, open wp-config.php.
- Locate commented-out configurations sections to alter the settings above if needed.
- Increase memory limit, max execution time, error display level, etc to more robust amounts.
- Save configuration changes. The site should now have more resources to prevent further crashes!
WordPress Suddenly Reverts To Default Theme

If your custom theme gets switched back to the default WordPress theme unexpectedly, here are some potential fixes:
Causes:
- Corrupted theme files – If theme files become corrupted during an update, WordPress will fall back to defaults.
- Incompatible theme – The update may have included core changes that your custom theme does not support yet.
Fixes:
- Reupload theme – Get a fresh copy of your theme and upload it to replace potentially corrupted files.
- Check the theme developer site – See if there is an updated version of your theme that maintains compatibility.
- Adjust theme code – Review update and compatibility notes for ways to update theme code to resolve issues.
Preventing Future Update Issues
While troubleshooting update errors takes time, there are preventative steps you can take to avoid issues down the road:
Back-Up Your Site
Before updating, always back up your WordPress database, plugins, themes, and core folders. Having backups gives you the ability to roll back in case of errors.
But what exactly should you be backing up on your WordPress site and how often? What files or folders are most critical? I break down everything you need to know about ideal WordPress backup strategies in my popular guide about the importance of regular WordPress backups. My simple tips make safeguarding your hard work easy even for beginners!
Stage Your Updates
Rather than updating plugins, themes, and WordPress core all at once, stage updates one by one on a staging copy of your site first. This isolates what specific update causes problems.
Clean Up Your Database
Outdated database tables and excess data can sometimes cause performance issues that lead to update errors. Regularly tidy up your database with cleanup plugins.
Closely Monitor Resources
If your site already runs near your web host’s CPU or RAM limits, an update pushing usage over the edge can lead to crashes and 500 errors during or after updates.
Conclusion
Troubleshooting update issues takes some work, but being armed with the right information on common WordPress errors can save you lots of headaches. Understanding the potential causes, having emergency access to log files and backups, and smartly preparing for updates by staging changes are proven tactics to smooth the update process.
Here’s hoping this guide gives you the confidence to update WordPress without worries of endless update loops or white screens of death! Let our comment section know of any other pesky update errors we should add to our troubleshooting list.

